

Sonic Chili Recipe (Easy To Make Tonight)
A real Sonic chili recipe starts with one simple truth: the chili makes the whole thing. You get a soft bun, a snappy hot dog, and a thick, dark chili loaded with roasted peppers, toasted dried chiles, and a small hit of coffee for depth.
That last part sounds strange, but it works better than you’d think.
This Sonic Chili Recipe is the real deal, and I mean it. I made this in my own kitchen last weekend and my whole family cleaned their plates in ten minutes flat.
If you love that drive-in chili dog with the thick, meaty chili and melty cheese on top, this one hits the same spot. Sonic chili dogs got famous because they mix a smoky, slightly sweet chili with a soft bun and a snappy hot dog, and honestly, it’s a combo that just works.
There’s something about the roasted peppers and dried chiles in this version that makes it taste even better than what you get at the drive-in window.
I got hooked on this Sonic drive in chili recipe after testing it three times to get the flavor just right. You’ll need ground beef, dried chiles, roasted peppers, and a few pantry spices you probably already own.

Why Roasted Peppers and Dried Chiles Matter
A lot of chili recipes skip this step, but after making both versions, I don’t think I’ll ever go back. Roasting the peppers gives the chili a sweeter, deeper taste without making it sugary. The peppers also blend into the sauce, so you don’t end up with big chunks. Instead, they help make the chili thick and smooth.
The dried pasilla and mulato chiles are just as important. Toasting them for a few seconds wakes up their flavor, and soaking them makes them easy to blend. They add a mild smoky taste with a little earthy richness that regular chili powder can’t match.
I tried making this recipe once using only chili powder. It was still good, but it missed that slow-cooked drive-in flavor. Once I added roasted vegetables and dried chiles, the whole pot tasted fuller, richer, and much closer to the chili I wanted.
Best Toppings and Bun Choices for Sonic-Style Chili Dogs
Always reach for top-cut hot dog buns because they hold the chili much better than regular side-split buns. They stay upright, so adding a thick scoop of chili is easier and a lot less messy.
A line of yellow mustard cuts through the rich beef with a bright, tangy bite. Finely diced onions add fresh crunch, while shredded sharp cheddar melts into the warm chili and makes every bite creamy.
If you want a small twist, add sliced jalapeños, crushed crackers, pickled jalapeños, or a dash of hot sauce.
Sonic Chili Ingredients You’ll Need
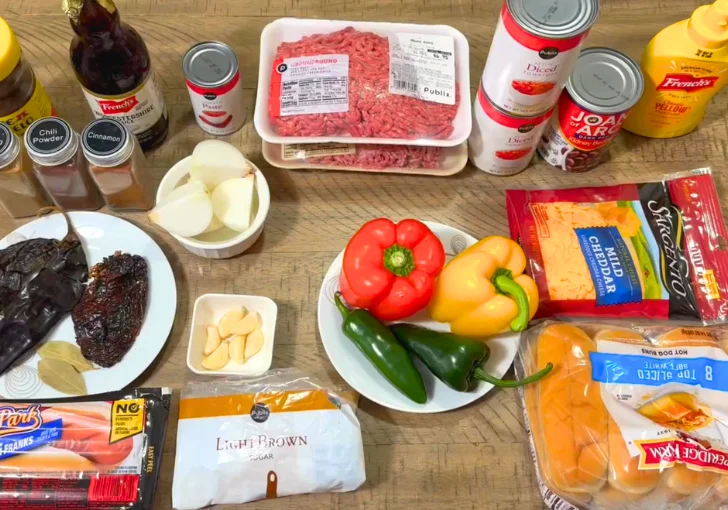
For the Chili
2 pounds ground beef – I use 80/20 ground beef because it stays juicy while the chili simmers for hours. Browning it well gives the chili a rich, beefy base. If there’s too much grease, I drain off a little before adding the seasonings.
2 dried pasilla chile peppers – Pasilla chiles give the chili a mild smoky flavor with earthy notes. I always toast them for a few seconds before soaking because that brings out more flavor without adding extra heat.
2 dried mulato chile peppers – Mulato chiles add a deeper, slightly sweet flavor that reminds me of raisins and cocoa. They’re one of the reasons this homemade chili tastes richer than recipes made with only chili powder.
1 medium onion, quartered – Roasting the onion takes away its sharp bite and brings out its natural sweetness. I like using a yellow onion because it blends smoothly into the chili after everything cooks together.
1 red bell pepper – A red bell pepper adds natural sweetness and balances the richer spices. Roasting it until the skin blisters gives the chili a fuller flavor without making it taste sweet.
1 yellow bell pepper – The yellow bell pepper works with the red pepper to build a smooth, rich chili. It adds another layer of mild sweetness and helps round out the roasted vegetable flavor.
1 poblano pepper – Poblano pepper brings a gentle earthy flavor with very little heat. After roasting and peeling, it melts into the chili and adds another layer of real pepper taste.
1 jalapeño pepper – One jalapeño gives the chili just enough kick without making it too spicy. I usually leave the seeds in for a little more heat, but you can remove them if you prefer.
4 cloves garlic – Roasted garlic becomes soft, sweet, and mellow. I roast the cloves with the vegetables instead of adding raw garlic because it gives the chili a smoother, richer flavor.
2 cans (14.5 ounces each) diced tomatoes, divided – I usually grab Rotel Original Diced Tomatoes or Hunt’s Diced Tomatoes when making this recipe. One can gets blended with the chiles, while the second adds texture to the finished chili.
1 can (6 ounces) tomato paste – Tomato paste thickens the chili and gives it a stronger tomato flavor. I normally use Hunt’s or Contadina, and both work great for building a rich, hearty sauce.
1 can (15 ounces) dark red kidney beans, drained – Kidney beans make the chili more filling and soak up all the great flavors while it simmers. I usually use Bush’s Best or whatever canned beans I already have in the pantry.
2 bay leaves – Bay leaves quietly add depth while the chili cooks for several hours. I always remember to remove them before serving since they’re only there to season the pot.
2 tablespoons chili powder – Chili powder gives the chili its classic flavor and works together with the dried peppers. I usually keep McCormick Chili Powder in my spice cabinet because it gives consistent results every time.
2 tablespoons ground cumin – Ground cumin adds a warm, earthy flavor that pairs perfectly with the beef and roasted peppers. Fresh cumin always smells stronger, so I replace mine every few months.
1 tablespoon light brown sugar – A little brown sugar balances the acidity from the tomatoes without making the chili sweet. I usually use Domino Light Brown Sugar, but any brand works just fine.
1 tablespoon Worcestershire sauce – Worcestershire sauce adds a deep savory flavor that makes the beef taste even richer. Lea & Perrins is my favorite because it has a bold flavor that blends perfectly into chili.
1 tablespoon instant coffee granules – Don’t skip the coffee. It doesn’t make the chili taste like coffee at all. I use Nescafé Classic Instant Coffee, and it simply brings out a deeper beef flavor.
½ teaspoon ground cinnamon – Just a small pinch of cinnamon gives the chili a warm background flavor. It doesn’t stand out on its own, but it helps tie all the spices together.
Salt, to taste – Salt brings all the flavors together. I season a little while cooking, then taste again before serving because the chili becomes more flavorful as it simmers.
Black pepper, to taste – Freshly ground black pepper adds a little bite that works well with the beef and spices. I usually grind it fresh instead of using pre-ground pepper.
1 to 2 tablespoons neutral oil – I use canola oil or avocado oil to roast the vegetables because both have a mild flavor and help the peppers brown without burning.
For the Chili Dogs
8 hot dogs – I like using Nathan’s Famous Beef Franks or Hebrew National because they have a rich beef flavor that holds up well under the thick homemade chili.
8 top-cut hot dog buns – Top-cut buns make these chili dogs much easier to build. They stay upright, hold more chili, and don’t fall apart as quickly once all the toppings are added.
Yellow mustard, for topping – Classic yellow mustard cuts through the rich chili with a bright, tangy flavor. I usually reach for French’s Classic Yellow Mustard because it gives that familiar drive-in taste.
½ cup finely diced onion – Fresh diced onion adds a crisp bite that balances the soft chili and melted cheese. I chop the pieces nice and small so they spread evenly over every hot dog.
1½ to 2 cups shredded cheddar cheese – I always shred sharp cheddar cheese from a block because it melts smoother than pre-shredded cheese. Tillamook or Cabot Sharp Cheddar are two brands I use often for this recipe.
How To Make Sonic Chili at Home
Step 1 | Roast the Vegetables
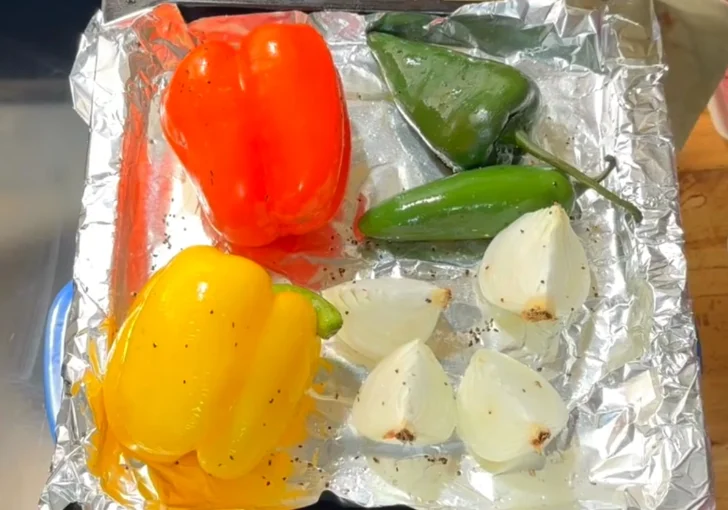
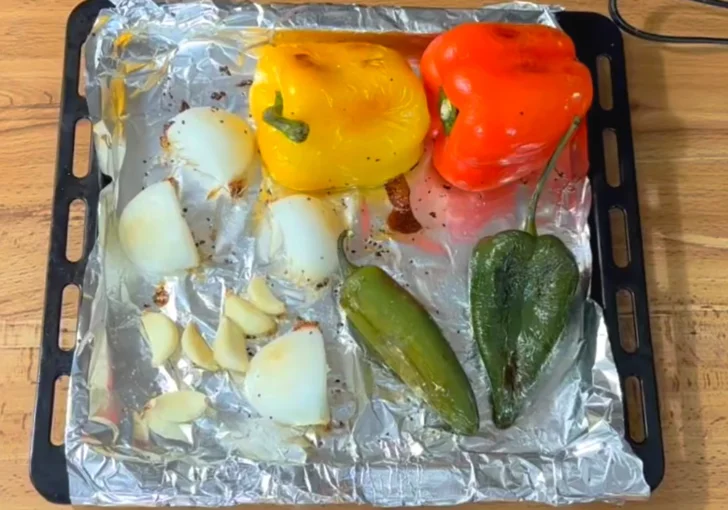
Preheat the oven to 450°F. Place the quartered onion, red bell pepper, yellow bell pepper, poblano pepper, and jalapeño on a baking sheet. Lightly coat everything with oil, then season with salt and black pepper.
Roast for 25 minutes, turn the vegetables over, add the garlic cloves to the pan, and roast for another 15 minutes until the peppers are blistered and tender.
Step 2 | Toast and Soften the Dried Chiles
Heat a dry skillet over medium-high heat. Toast the dried pasilla and mulato chiles for just a few seconds on each side until fragrant, being careful not to burn them. Transfer the toasted chiles to a bowl or saucepan of hot water and let them soak until completely soft.
Step 3 | Brown the Beef
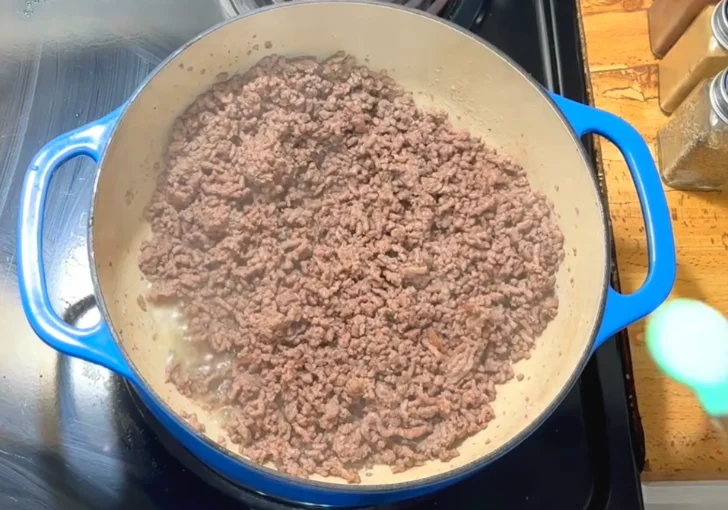
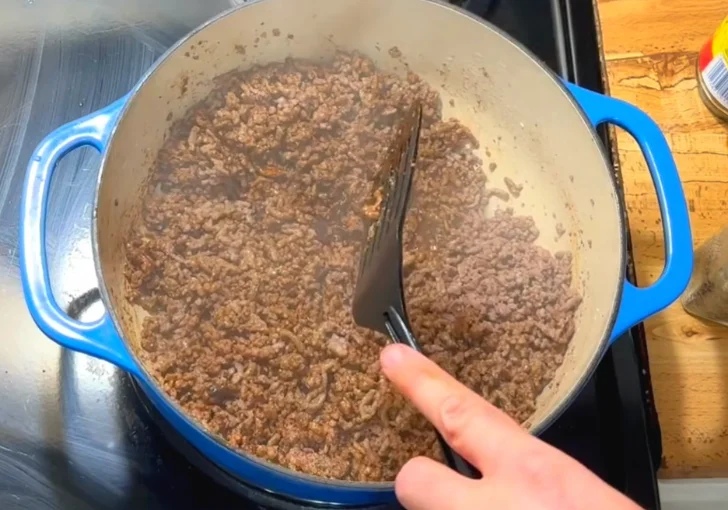
Place the ground beef in a large heavy pot over medium-high heat. Break it into small pieces while cooking until fully browned. Drain excess grease if needed.
Step 4 | Make the Chile-Tomato Purée
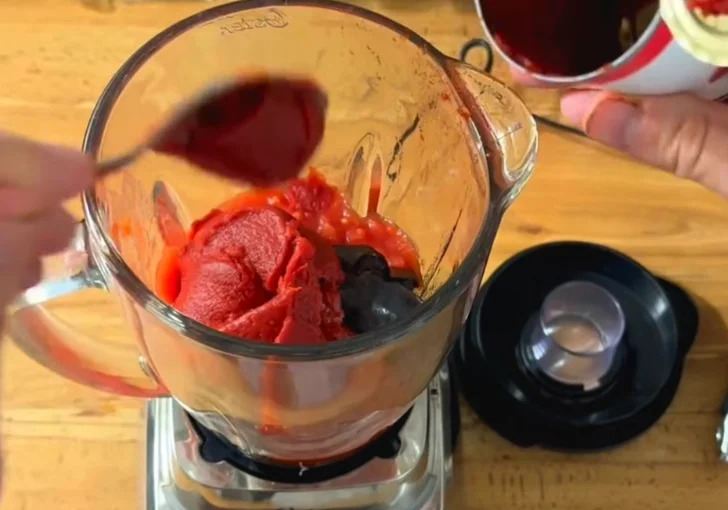
Add the softened dried chiles, one can of diced tomatoes, and the tomato paste to a blender. Blend until completely smooth, creating a thick chile-tomato sauce.
Step 5 | Steam and Peel the Roasted Peppers
Once the vegetables come out of the oven, loosely cover the pan with foil and let them rest until cool enough to handle. Peel the skins from the peppers, then chop the peppers, onion, and roasted garlic into small pieces.
Step 6 | Season the Beef
Season the browned beef with salt, black pepper, cinnamon, chili powder, cumin, brown sugar, Worcestershire sauce, and instant coffee granules. Stir well until the spices evenly coat the meat and cook for a few minutes so the flavors begin to bloom.
Step 7 | Build the Chili
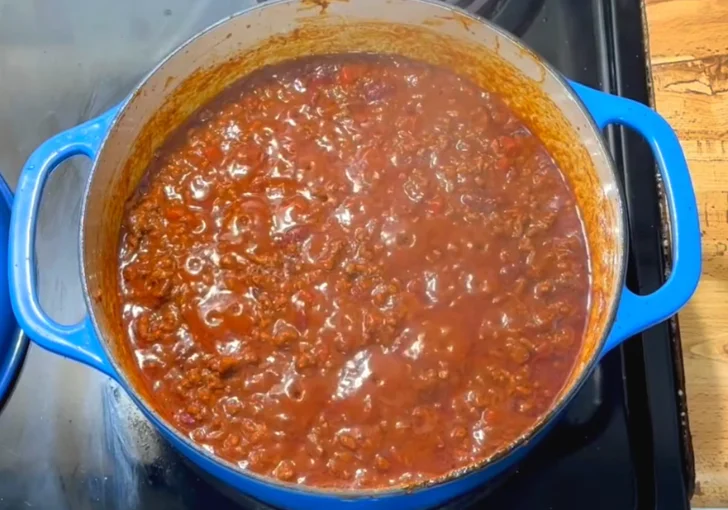
Add the remaining can of diced tomatoes, kidney beans, and the blended chile-tomato purée to the pot. Stir everything together until well combined.
Step 8 | Add the Roasted Vegetables
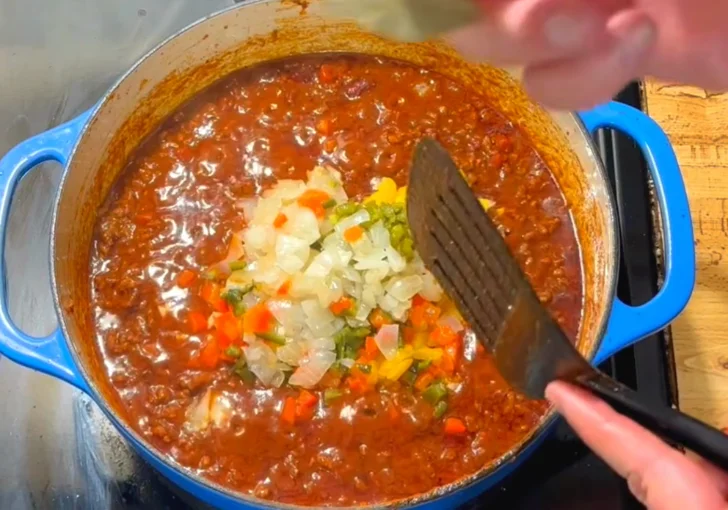
Stir the chopped roasted peppers, onion, garlic, and bay leaves into the chili. Reduce the heat to the lowest setting and let the chili simmer gently for 2 to 4 hours, stirring occasionally. As it cooks, the vegetables soften even more and blend into the sauce, creating a thick, rich chili with deep flavor.
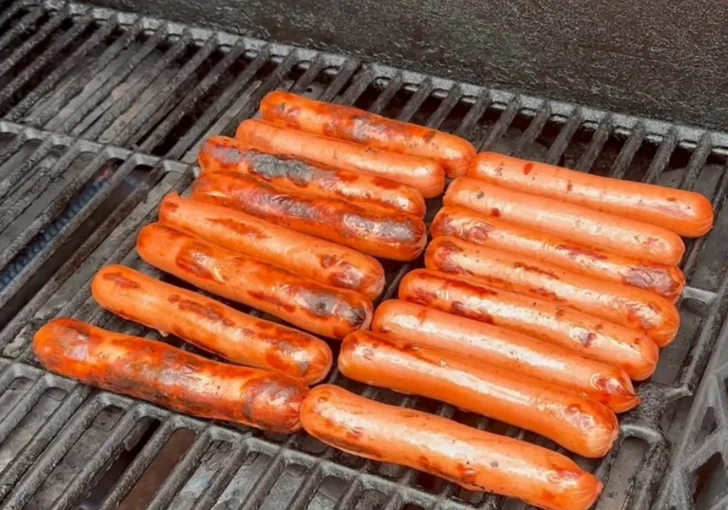
Step 9 | Cook the Hot Dogs
Cook the hot dogs using your preferred method until heated through. Warm the top-cut buns so they’re soft and ready for serving.
Step 10 | Assemble the Chili Dogs
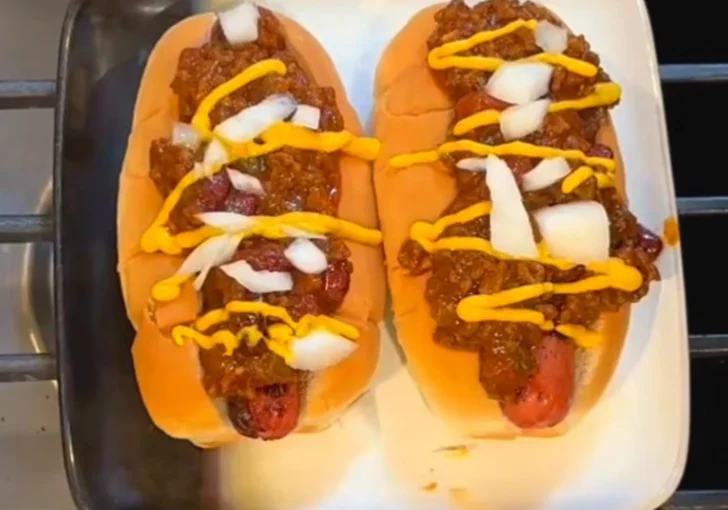
Place one hot dog into each bun. Spoon a generous amount of hot chili over the top, making sure it fills the bun without overflowing.
Step 11 | Add the Toppings
Drizzle yellow mustard over the chili. Sprinkle with diced onions, then cover generously with shredded cheddar cheese.
Step 12 | Melt the Cheese
Place the assembled chili dogs under the broiler for about 1 minute, just until the cheddar cheese melts. Remove carefully and serve immediately while hot.
Sonic Chili Variations You Can Try
Turkey Chili Dog – Swap the ground beef for ground turkey if you want a lighter version. It still soaks up all those roasted pepper flavors just fine.
Vegetarian Chili Dog – Use plant-based crumbles instead of beef, and load up on the roasted veggies for extra body and texture.
Extra Spicy Version – Add another jalapeño or toss in a chopped serrano pepper for a chili that really brings the heat.
Cheese-Stuffed Hot Dogs – Use hot dogs with cheese already inside for a double cheese payoff in every bite.
Chili Cheese Fries Style – Skip the bun altogether and pour this chili over crispy fries with cheese for a loaded side dish.
Tips for Best Chili Like Sonic Drive-In
Don’t rush the simmer time. I tried cutting it short once and the chili tasted thin and the vegetables hadn’t melted in yet.
Let it go the full 4 hours if you have the time. Toast your dried chiles just until fragrant, burnt chiles turn bitter fast and ruin the whole pot.
Always drain extra grease from your beef so your chili doesn’t turn oily. If your chili tastes flat, a small pinch of salt right before serving wakes everything up.
And warm your buns before you build the dogs, cold bread against hot chili just isn’t the same.
Ways to Serve Sonic Chili Beyond Hot Dogs

This chili isn’t just for hot dogs, and once you make a big batch, you’ll want to use it everywhere.
- Spoon it over a baked potato with sour cream and chives for a filling lunch
- Use it as a topping for nachos with jalapeños and extra cheese
- Stuff it into a burrito with rice and beans for a heartier meal
- Serve it plain in a bowl with cornbread on the side, classic and simple
For a chili bowl, I like to layer rice on the bottom, then a big scoop of chili, shredded cheese, diced onion, and a dollop of sour cream. Add some crushed tortilla chips on top for crunch.
It turns into a full dinner in one bowl, and it’s one of my favorite ways to stretch leftovers without getting bored of the same old chili dog.
How to Store, Reheat, and Freeze Leftover Chili
Refrigerator
Let the chili cool before placing it into an airtight container. Store it in the refrigerator for up to 4 days. I keep the hot dogs and buns separate so they stay fresh.
Reheating
Warm the chili in a saucepan over medium-low heat for about 8 to 10 minutes, stirring every few minutes. If it becomes too thick, stir in 2 to 3 tablespoons of water or beef broth. You can also microwave individual servings in 30-second bursts until hot.
Freezer
Cool the chili completely before freezing. Divide it into freezer-safe containers or freezer bags. Freeze for up to 3 months. Thaw overnight in the refrigerator before reheating for the best texture.
FAQs
Can I make the chili a day ahead?
Yes. I actually recommend it. After sitting overnight in the refrigerator, the flavors blend together even more. Reheat it slowly on the stove before serving, and it tastes even richer than the first day.
Do I have to use dried pasilla and mulato chiles?
For the closest Sonic Chili Dog flavor, yes. They give the chili a deeper taste than chili powder alone. If you can’t find them, use ancho chiles, but the flavor will change a little.
Can I skip the kidney beans?
Absolutely. If you prefer a meat-only chili, simply leave them out. The chili will still become thick and rich after simmering for a few hours.
Which hot dogs work best?
I usually use all-beef hot dogs because they have a stronger flavor, but regular beef and pork hot dogs also work well. Choose your favorite brand.
Can I make this chili in a slow cooker?
Yes. Brown the beef first, roast the vegetables, then transfer everything to the slow cooker. Cook on Low for 6 to 8 hours or High for 3 to 4 hours.
Is this chili very spicy?
Not really. The roasted peppers and dried chiles add more flavor than heat. If you like spicy food, add another jalapeño or a little cayenne pepper.
Can I make the chili without coffee?
Yes. The instant coffee deepens the beef flavor, but you can leave it out if you prefer. The chili will still taste great.
Why should I roast the vegetables first?
Roasting brings out the natural sweetness in the peppers and onion. It also gives the chili a richer flavor that you won’t get from raw vegetables.
What’s the best cheese for chili dogs?
Sharp cheddar melts well and adds great flavor. Mild cheddar, Monterey Jack, or a cheddar blend also work nicely if that’s what you have.
How do I keep the chili from sliding off the hot dog?
Let the chili simmer until it becomes thick. Thin chili runs off the bun quickly. A thicker chili stays on top and gives every bite plenty of flavor.
Sonic Chili Recipe

Make this Sonic Chili Recipe at home with slow-simmered beef, roasted peppers, dried chiles, and classic toppings that bring back the flavor of your favorite Sonic-style meal. I love how this homemade copycat turns simple ingredients into rich, hearty chili with easy steps and beginner-friendly prep. Ready in about 4½ hours with medium difficulty. Serve your Sonic chili dog with crispy fries, onion rings, or a cold drink for the full drive-in experience.
Ingredients
- 2 pounds ground beef
- 2 dried pasilla chile peppers
- 2 dried mulato chile peppers
- 1 medium onion, quartered
- 1 red bell pepper
- 1 yellow bell pepper
- 1 poblano pepper
- 1 jalapeño pepper
- 4 cloves garlic
- 2 cans (14.5 ounces each) diced tomatoes, divided
- 1 can (6 ounces) tomato paste
- 1 can (15 ounces) dark red kidney beans, drained
- 2 bay leaves
- 2 tablespoons chili powder
- 2 tablespoons ground cumin
- 1 tablespoon light brown sugar
- 1 tablespoon Worcestershire sauce
- 1 tablespoon instant coffee granules
- ½ teaspoon ground cinnamon
- Salt, to taste
- Black pepper, to taste
- 1 to 2 tablespoons neutral oil (for roasting vegetables)
For the Chili Dogs
- 8 hot dogs
- 8 top-cut hot dog buns
- Yellow mustard, for topping
- ½ cup finely diced onion
- 1½ to 2 cups shredded cheddar cheese
Instructions
- Preheat the oven to 450°F. Place the quartered onion, red bell pepper, yellow bell pepper, poblano pepper, and jalapeño on a baking sheet. Lightly coat everything with oil, then season with salt and black pepper. Roast for 25 minutes, turn the vegetables over, add the garlic cloves to the pan, and roast for another 15 minutes until the peppers are blistered and tender.
- Heat a dry skillet over medium-high heat. Toast the dried pasilla and mulato chiles for just a few seconds on each side until fragrant, being careful not to burn them. Transfer the toasted chiles to a bowl or saucepan of hot water and let them soak until completely soft.
- Place the ground beef in a large heavy pot over medium-high heat. Break it into small pieces while cooking until fully browned. Drain excess grease if needed.
- Add the softened dried chiles, one can of diced tomatoes, and the tomato paste to a blender. Blend until completely smooth, creating a thick chile-tomato sauce.
- Once the vegetables come out of the oven, loosely cover the pan with foil and let them rest until cool enough to handle. Peel the skins from the peppers, then chop the peppers, onion, and roasted garlic into small pieces.
- Season the browned beef with salt, black pepper, cinnamon, chili powder, cumin, brown sugar, Worcestershire sauce, and instant coffee granules.
- Stir well until the spices evenly coat the meat and cook for a few minutes so the flavors begin to bloom.
- Add the remaining can of diced tomatoes, kidney beans, and the blended chile-tomato purée to the pot. Stir everything together until well combined.
- Stir the chopped roasted peppers, onion, garlic, and bay leaves into the chili. Reduce the heat to the lowest setting and let the chili simmer gently for 2 to 4 hours, stirring occasionally. As it cooks, the vegetables soften even more and blend into the sauce, creating a thick, rich chili with deep flavor.
- Cook the hot dogs using your preferred method until heated through. Warm the top-cut buns so they're soft and ready for serving.
- Place one hot dog into each bun. Spoon a generous amount of hot chili over the top, making sure it fills the bun without overflowing.
- Drizzle yellow mustard over the chili. Sprinkle with diced onions, then cover generously with shredded cheddar cheese.
- Place the assembled chili dogs under the broiler for about 1 minute, just until the cheddar cheese melts. Remove carefully and serve immediately while hot.
Nutrition Information:
Serving Size:
1 chili dogAmount Per Serving: Calories: 690Total Fat: 44gCholesterol: 105mgProtein: 35g
This Sonic Chili Dog Recipe brings that drive-in favorite right into your own kitchen, and honestly, it might just beat the original. Between the roasted peppers, toasted dried chiles, and that rich, meaty chili, every bite feels like something special.